
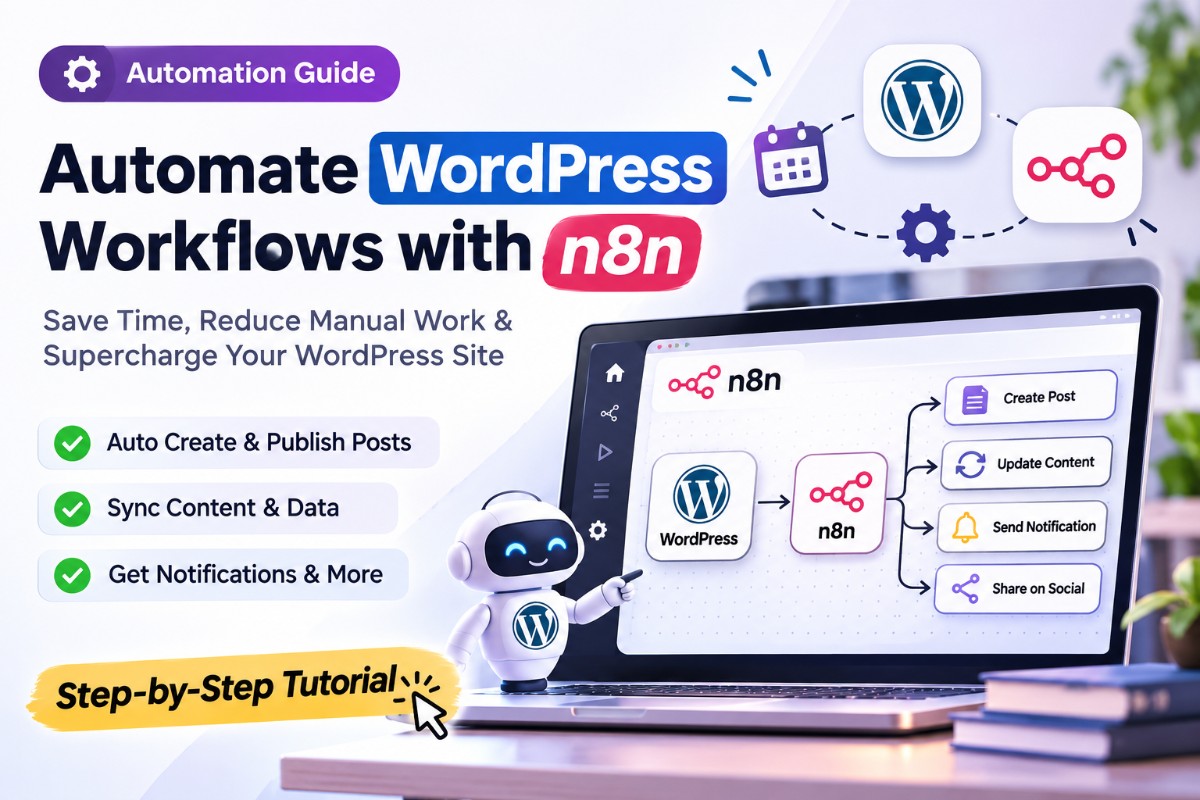
Automate WordPress Workflows with n8n Guide
automate WordPress workflows with n8n guide: What is n8n and Why Use It for WordPress Automation?
n8n is an open-source workflow automation tool that lets you connect various apps and services using visual workflows. Unlike many proprietary automation platforms, n8n offers flexibility, self-hosting options, and an extensive library of integrations including WordPress. Automating WordPress workflows with n8n can help you handle tasks such as:
- Publishing posts automatically based on external triggers
- Syncing form submissions or user data with other platforms
- Managing backups and content updates
- Generating alerts and reports when specific events occur
Choosing n8n over other tools also means better control over your data and workflows, which is critical for websites handling sensitive or proprietary content. For example, if you run a membership site with confidential user data, self-hosting n8n ensures that no third party has access to your automation logic or credentials.
Moreover, n8n’s visual editor allows non-developers to create complex workflows without writing code, while still providing the flexibility for developers to extend functionality using JavaScript within Function nodes. This hybrid approach makes it suitable for a wide range of users.
Setting Up n8n to Work with Your WordPress Site
Prerequisites
- A WordPress site with administrator access
- n8n installed and running (self-hosted or cloud instance)
- Basic understanding of APIs and webhooks
- Access to WordPress REST API (enabled by default in recent versions)
Before diving into automation, ensure your WordPress installation is up to date, as older versions may have limited REST API support or security vulnerabilities.
Step 1: Install and Configure n8n
If you haven’t installed n8n yet, follow the official installation instructions for your environment. For beginners, a Docker container or cloud-hosted n8n instance is recommended for easy setup. Docker offers a straightforward way to run n8n isolated from your system, making upgrades and backups easier.
Example Docker run command:
docker run -it --rm \
  --name n8n \
  -p 5678:5678 \
  -v ~/.n8n:/home/node/.n8n \
  n8nio/n8n
This command maps the n8n web interface to port 5678 and persists data in your home directory.
Once n8n is running, log into the n8n editor interface (usually at http://localhost:5678) where you will build your workflows.
Step 2: Prepare WordPress for API Access
WordPress exposes a REST API that n8n can interact with. To authenticate securely, create an application password in WordPress:
- Go to your WordPress dashboard > Users > Profile
- Scroll down to the “Application Passwords” section
- Enter a name for the password (e.g., “n8n Integration”) and generate it
- Save the generated password securely; it will not be shown again
You will use your WordPress username and this application password to authenticate API calls from n8n. Application passwords are preferred over using your main account password because they can be revoked individually without affecting your login credentials.
Important Security Note: Ensure your WordPress site uses HTTPS to encrypt API traffic. Avoid sending credentials over unsecured HTTP to prevent interception.
Step 3: Verify REST API Access
Before building workflows, test your API credentials using a tool like curl or Postman to confirm access:
curl --user username:application_password \
  https://yourdomain.com/wp-json/wp/v2/posts
A successful response will return JSON data about your posts. If you encounter errors like 401 Unauthorized, double-check your credentials and ensure the application password is active.
Building Your First WordPress Automation Workflow in n8n
Example Workflow: Auto-Publish Posts from a Google Sheet
This example demonstrates how to automate publishing WordPress posts based on data entered into a Google Sheet. This can be useful for content teams managing editorial calendars externally, allowing non-technical staff to add content without logging into WordPress.
Step 1: Create Google Sheets Trigger
Use the Google Sheets node in n8n to watch for new rows added to your spreadsheet. Configure it with your Google account and select the appropriate sheet and worksheet. Set the trigger to poll at a reasonable interval (e.g., every 5 minutes) to balance responsiveness and API usage.
Tip: Use a dedicated sheet column to mark rows as “processed” to avoid duplicate posts.
Step 2: Format Post Data
Use the Set or Function node to map Google Sheet columns (e.g., title, content, categories) into the format required by the WordPress REST API. For example, the WordPress API expects categories as an array of category IDs, so you might need to convert category names to IDs via a lookup.
Example Function node snippet to format data:
return items.map(item => {
  return {
    json: {
      title: item.json.Title,
      content: item.json.Content,
      status: 'publish',
      categories: item.json.Categories ? item.json.Categories.split(',').map(Number) : []
    }
  };
});
This example assumes your sheet has columns named “Title”, “Content”, and “Categories” (comma-separated category IDs).
Step 3: Create WordPress Post
Add an HTTP Request node configured to POST to https://yourdomain.com/wp-json/wp/v2/posts. Use Basic Auth with your WordPress username and application password. Pass the post data as JSON in the request body.
Set the post status to “publish” or “draft” depending on your workflow. Publishing directly can be risky, so consider starting with “draft” status and reviewing posts before going live.
Step 4: Mark Rows as Processed (Optional)
To prevent duplicate posts, add a Google Sheets node to update the row with a “Processed” flag or timestamp after successful post creation.
Best Practices and Troubleshooting
- Test your workflow with a draft post before publishing live content. This prevents accidental public posting of incomplete or test content.
- Watch for API rate limits or authentication errors in n8n execution logs. WordPress REST API may limit requests, especially on shared hosting.
- Use the n8n Error Workflow guide to catch and handle failures gracefully. This can include retry mechanisms or notifications on failure.
- Regularly back up your WordPress site before automating content publishing to avoid accidental data loss. Use plugins or hosting provider backups.
- Validate data inputs. Ensure Google Sheets data is sanitized to avoid injection of unwanted HTML or scripts.
- Log workflow executions. Keep records of posts published via automation for auditing.
Advanced WordPress Automation Scenarios with n8n
1. Syncing WooCommerce Orders with External CRMs
WooCommerce provides webhook triggers for order events like creation, update, or cancellation. Use these webhooks in n8n to automatically send order data to your CRM or email marketing platform. This improves customer management and follow-ups without manual data entry.
Example: When a new order is placed, n8n receives the webhook, extracts customer details and order items, then creates or updates a contact in Salesforce or HubSpot.
Implementation Tips:
- Secure your WooCommerce webhooks with secret keys.
- Use n8n’s webhook node to receive data and parse JSON payloads.
- Handle error cases such as missing customer emails or invalid data.
2. Managing Media and Backups
Automate the export of media files or database backups to cloud storage services like AWS S3 or Dropbox on a schedule or triggered by events. This reduces manual backup overhead and ensures offsite copies for disaster recovery.
Example: Schedule a workflow that runs nightly, triggers a WordPress backup plugin via API or CLI, then uploads the backup file to S3.
Considerations:
- Ensure backups do not impact site performance during peak hours.
- Encrypt backups before uploading for security.
- Test restore procedures regularly.
3. User Registration and Notification Automation
Trigger welcome emails, Slack alerts, or CRM updates whenever a new user registers on your WordPress site. This can be done by listening to user registration hooks or polling the users endpoint.
Example: When a new user registers, n8n sends a personalized welcome email, adds the user to a mailing list, and posts a notification in a Slack channel.
Implementation Tips:
- Use WordPress plugins that expose user registration webhooks or custom API endpoints if needed.
- Verify user data before sending communications to comply with privacy laws.
- Throttle notifications to avoid spam in case of bulk registrations.
Security and Performance Considerations
When automating WordPress workflows with n8n, keep these points in mind to maintain security and optimal performance:
- Secure API Credentials: Store credentials securely in n8n credentials manager and avoid exposing them in public workflows. Use environment variables or encrypted vaults if available.
- Use HTTPS: Ensure your WordPress site uses HTTPS to encrypt API traffic, protecting credentials and data in transit.
- Rate Limits: Be aware of server limits on API requests to prevent throttling or downtime. Implement exponential backoff or retry logic in your workflows.
- Backup and Staging: Test workflows on a staging site before applying to production. Maintain regular backups to recover from any automation mishaps.
- Performance Monitoring: Monitor your site’s Core Web Vitals metrics like Largest Contentful Paint (LCP), Interaction to Next Paint (INP), and Cumulative Layout Shift (CLS) to ensure automation doesn’t degrade user experience. Automation should not overload your server or slow down page loads.
- Limit Permissions: Use WordPress user accounts with the minimum necessary permissions for API access. Avoid using administrator accounts if possible.
- Audit Logs: Enable and review audit logs for API activity to detect unusual or unauthorized actions.
Checklist: Automate WordPress Workflows with n8n
- Set up n8n instance and access editor interface
- Enable WordPress REST API and generate application password
- Create and test simple workflow (e.g., publish post via API)
- Implement error handling using n8n error workflows
- Secure credentials and use HTTPS for all API calls
- Test workflows on staging environment before production
- Monitor API usage and site performance post-deployment
- Document workflows and maintain version control if possible
- Schedule periodic reviews of automation effectiveness and security
FAQs About Automating WordPress Workflows with n8n
Can I automate any WordPress action with n8n?
Most WordPress actions that are accessible via the REST API or webhooks can be automated with n8n. However, some plugin-specific functions might require custom API endpoints or additional configuration. For example, if you use a membership plugin that does not expose REST endpoints, you may need to develop custom API routes or use alternative triggers.
Is n8n free to use with WordPress?
n8n is open-source and free to self-host. Some cloud-hosted plans may have costs. Using n8n with WordPress REST API does not require additional fees beyond your hosting. Self-hosting ensures no vendor lock-in and full control.
How do I secure my automation workflows?
Use strong, unique application passwords, store credentials securely within n8n, use HTTPS, and implement error handling to avoid data leaks or unintended actions. Additionally, restrict access to your n8n editor interface with authentication and network controls. Regularly update n8n and WordPress to patch security vulnerabilities.
What are common errors when integrating WordPress with n8n?
Common issues include authentication failures, incorrect API endpoints, permission errors, and rate limiting. Review n8n logs and WordPress REST API documentation to troubleshoot. For example, a 403 Forbidden error often indicates insufficient user permissions. A 429 Too Many Requests error means you need to reduce request frequency or implement retries.
Can I automate SEO-related tasks with n8n and WordPress?
Yes, you can automate tasks like updating meta tags, generating sitemaps, or triggering SEO audits. For example, you can schedule workflows to update SEO plugin settings or ping search engines after publishing new content. For more on optimizing WordPress SEO, check our On Page SEO for WordPress Guide.
Conclusion and Next Steps
Automating WordPress workflows with n8n is a powerful way to streamline your site management, reduce manual work, and improve consistency. Start small with simple workflows, test carefully, and progressively implement more complex automation tailored to your needs. Always prioritize security and backups to safeguard your site.
To deepen your WordPress automation skills, explore related topics like n8n vs Zapier vs Make for choosing the right tool, and review n8n Webhook Security Guide 2026 to protect your integrations.
Remember, effective automation is an iterative process. Monitor your workflows, gather feedback from users, and refine your processes to maximize benefits while minimizing risks.
Official Resources and Further Reading
These official resources are useful for checking the documentation and maintaining your setup as tools change.